Shopify Conversion Tracking
Watch the video tutorial:
Shopify's Customer Events lets you fire a Rumble Ads Center (RAC) conversion whenever a shopper takes an action in your store. This page covers two events:
- Purchase — fires on
checkout_completed. - Add to Cart — fires on
product_added_to_cart.
Each event maps to its own Conversion Action in RAC, so you'll have one Conversion Action ID per event you want to track.
Before you begin
- In RAC, create a Conversion Action for each event you want to track (e.g., one for Purchase, one for Add to Cart). Each gives you a numeric Conversion Action ID — used as the
to:value in the snippet. - Note your RAC global tag ID, formatted
AV-XXXX. This is one per RAC account and is different from the Conversion Action ID. Don't mix them up.
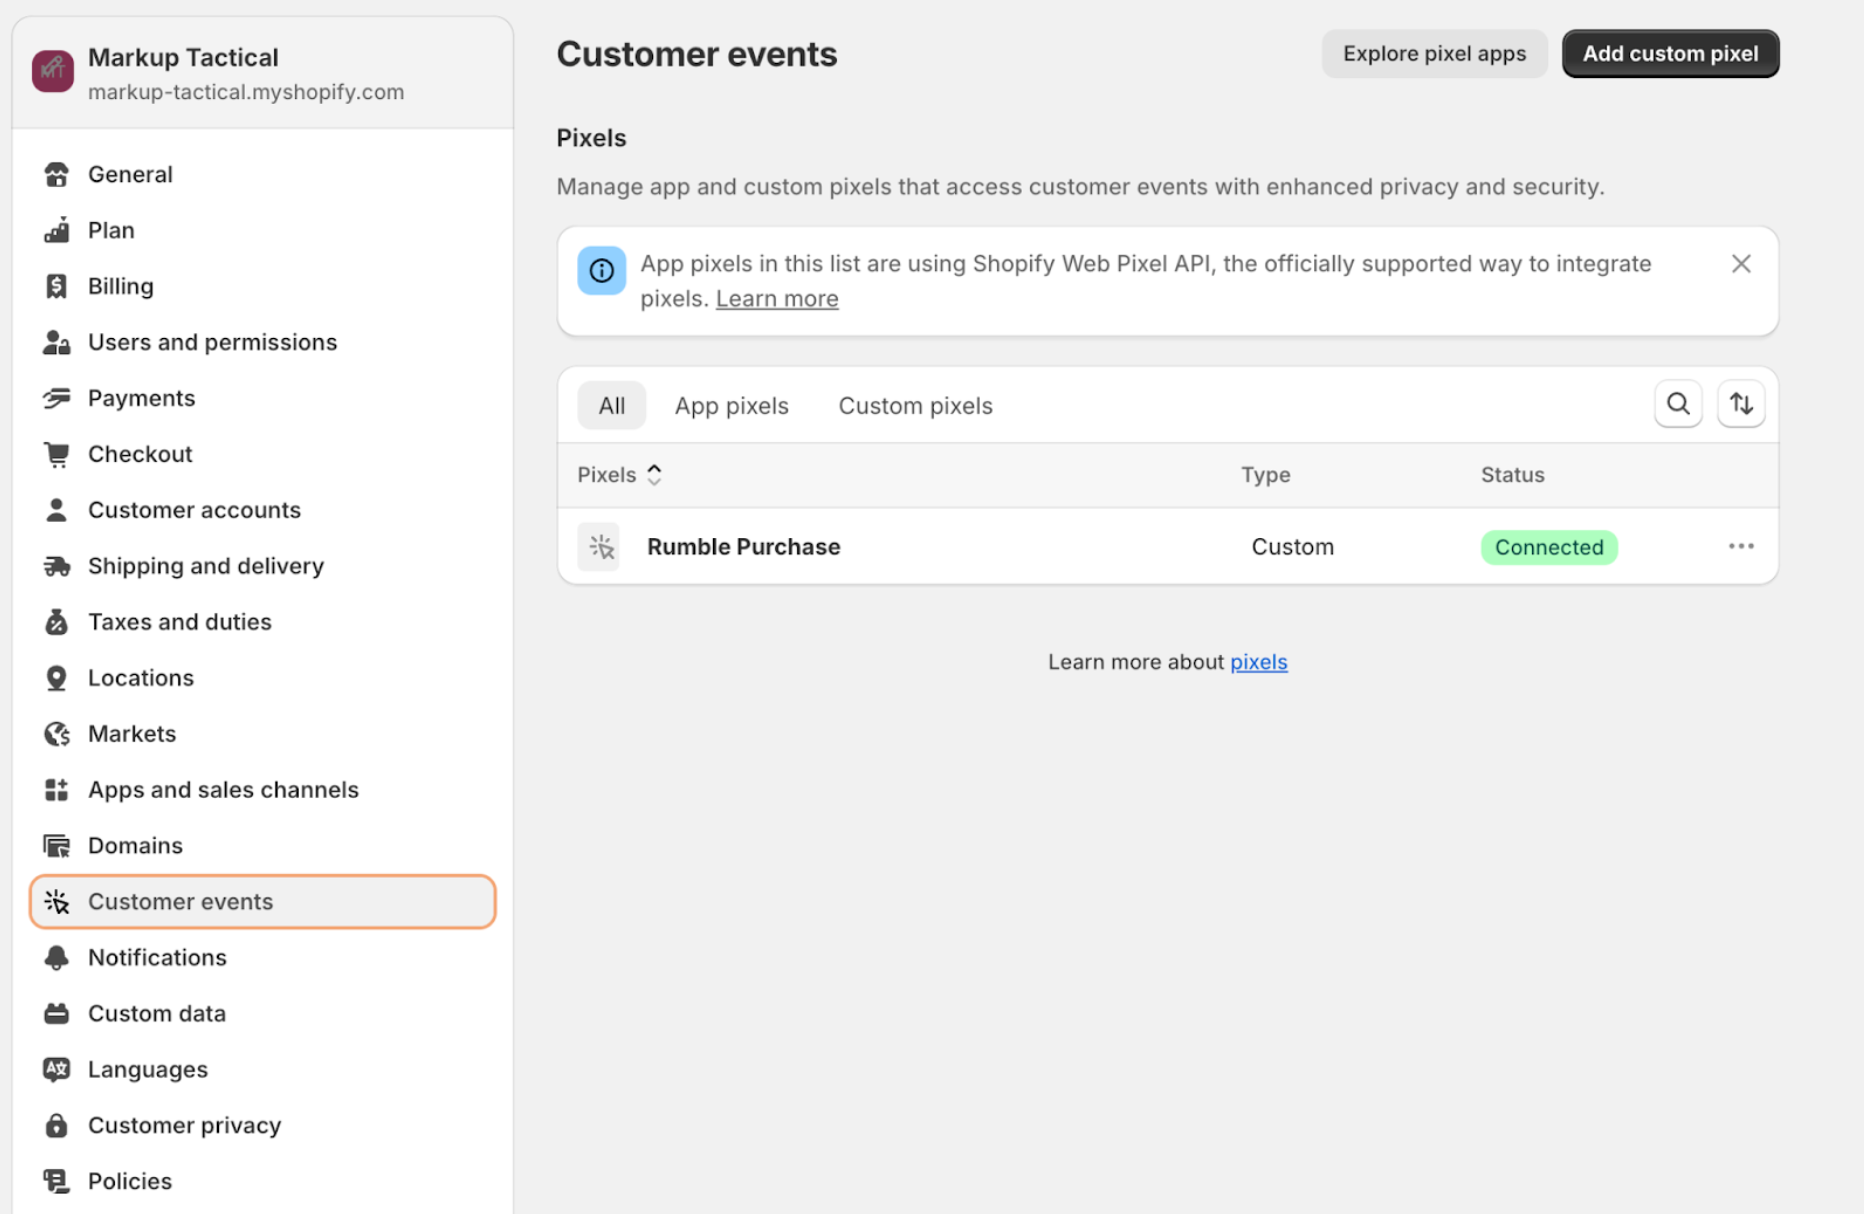
Step 1: Open Shopify Customer Events
- Go to Shopify Admin → Settings → Customer Events.
- Select Add custom pixel (or open an existing custom pixel).
- Name it (for example,
Rumble Ads Center) and select Save.
Shopify's Customer Events code editor expects raw JavaScript. Do not wrap any of the snippets below in script tags — the pixel will fail to load if you do.
Step 2: Add the global RAC tag
Paste this once at the top of the pixel's code editor. It loads ratag.js and initializes the data queue. Replace AV-XXXX with your RAC global tag ID.
const ratagScript = document.createElement('script');
ratagScript.setAttribute('src', 'https://a.ads.rmbl.ws/ratag?id=AV-XXXX');
ratagScript.setAttribute('async', '');
document.head.appendChild(ratagScript);

window._ratagData = window._ratagData || [];
function ratag() { _ratagData.push(arguments); }
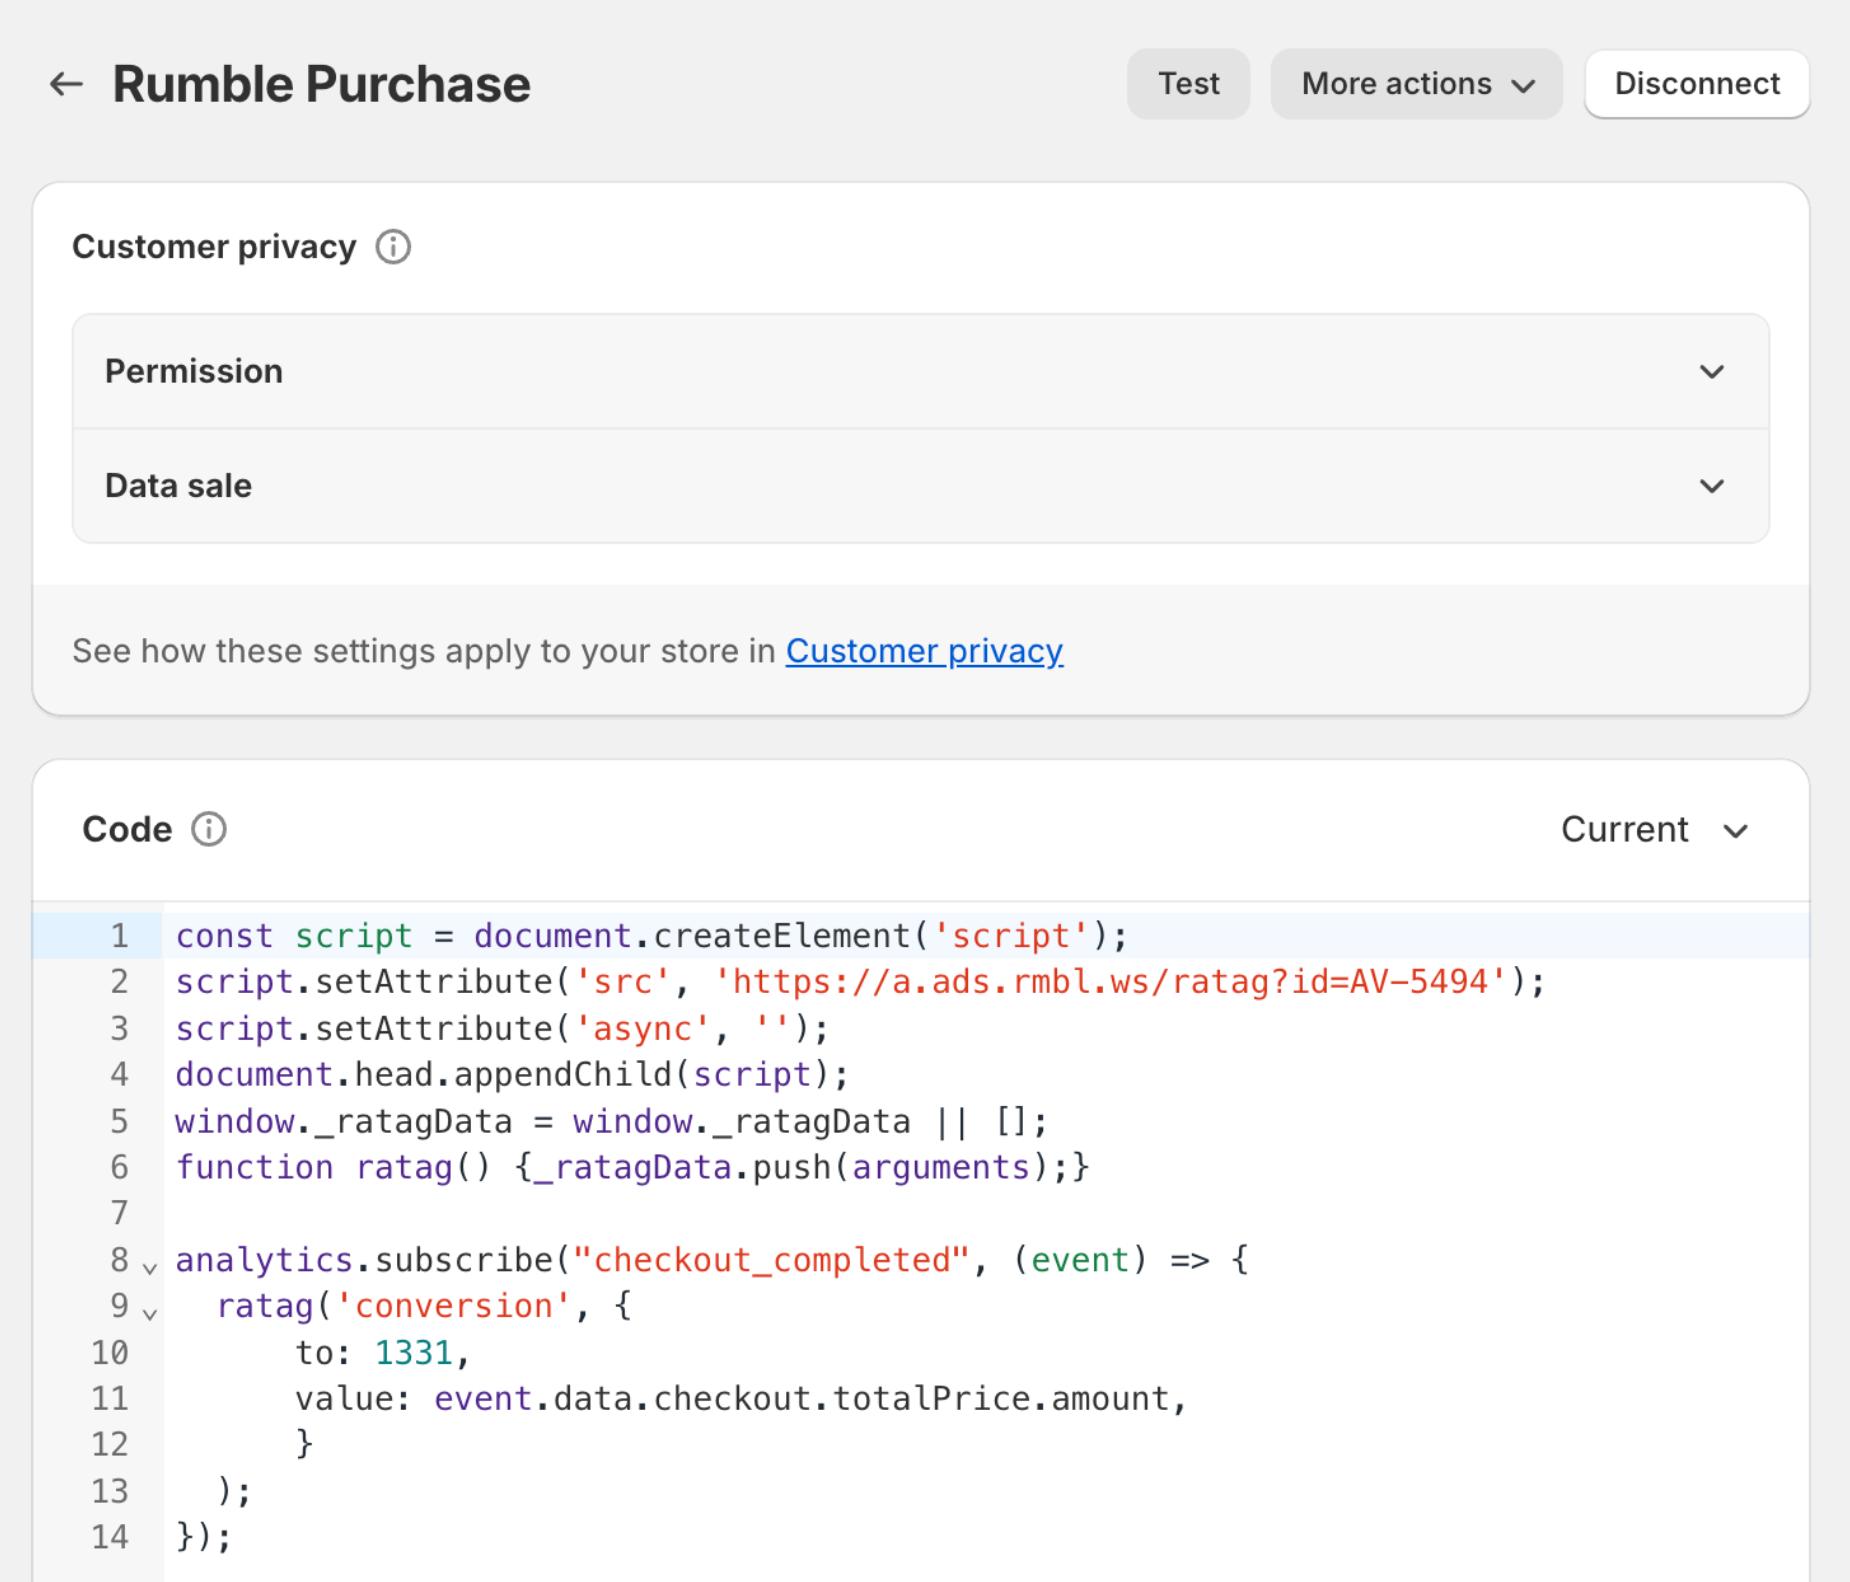
Step 3: Track purchases (checkout_completed)
Append this below the global tag in the same pixel. Replace XXXX with your Purchase Conversion Action ID.
analytics.subscribe("checkout_completed", (event) => {
  ratag('conversion', {
    to: XXXX, // Purchase Conversion Action ID
    value: event.data.checkout.totalPrice.amount
  });
});
Step 4: Track Add to Cart (product_added_to_cart)
Append this below Step 3 in the same pixel. Replace XXXX with your Add to Cart Conversion Action ID — this is a different number from the Purchase ID above.
analytics.subscribe("product_added_to_cart", (event) => {
  const line = event.data.cartLine;
  ratag('conversion', {
    to: XXXX, // Add to Cart Conversion Action ID
    value: line.cost.totalAmount.amount
  });
});
Notes:
product_added_to_cartfires every time a shopper adds an item to the cart. If you only want to count one Add to Cart per click, set the Conversion Action's Count to Every in RAC.cartLine.cost.totalAmount.amountalready accounts for quantity. Useline.merchandise.price.amountif you want the unit price instead.
When you're done, select Save, then Connect at the top of the pixel page to activate it.
Test the implementation
Use RAC's Integration Tester to confirm both events fire correctly — you don't need to run a live ad to validate your pixel:
- In RAC, open Conversion Tracking and launch the Integration Tester.
- Choose your storefront's landing page URL.
- Select the Conversion Action(s) you want to verify (Purchase, Add to Cart, or both).
- The tester opens your store in a new tab with a predefined click ID pre-attached to the URL, so any conversion that fires will be attributed to that test click.
- In the new tab, perform the action under test:
- Add to Cart: add any product to the cart.
- Purchase: check out using Shopify's Bogus Gateway (or any test order method).
- Switch back to the Integration Tester — each selected Conversion Action flips to verified as soon as RAC receives the conversion.
If a conversion doesn't verify, double-check:
- The custom pixel is Connected, not just Saved.
- The two
to:values are Conversion Action IDs (numbers), not the globalAV-XXXXtag. - Your browser's DevTools → Console isn't reporting errors from the pixel script.