Google Tag Manager Conversion Tracking
Step 1: Open Google Tag Manager
- Go to Google Tag Manager and log in to your account.
- Select the appropriate workspace for the website where you want to set up the RAC tracking.
Step 2: Create a new tag
- In the left-hand menu, click on Tags.
- Click on the New button to create a new tag.
Step 3. Set up the Global Tag
- Name your tag something recognizable, such as "RAC Global Tag".
- Under Tag Configuration, select "Custom HTML".
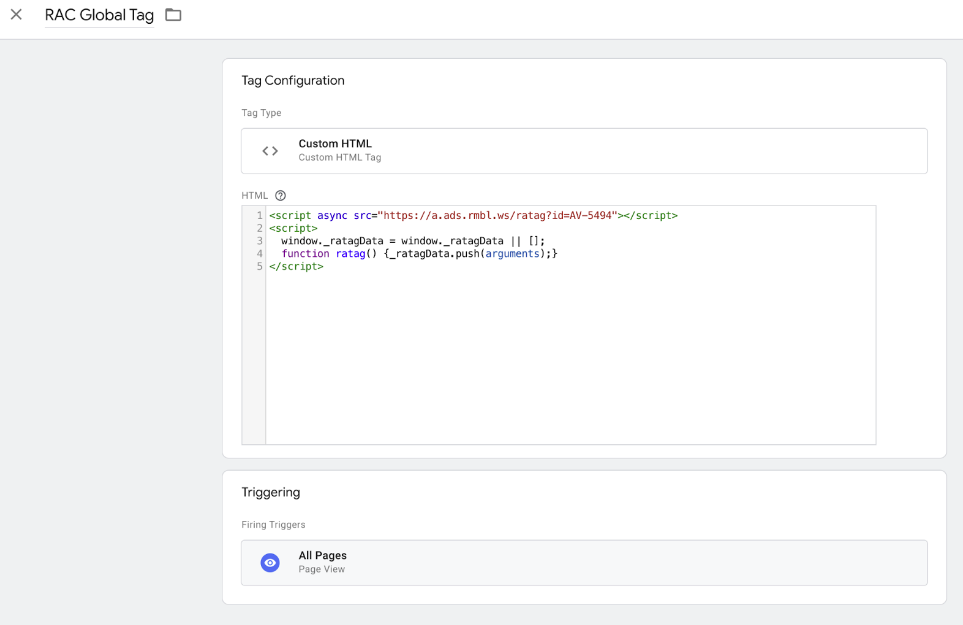
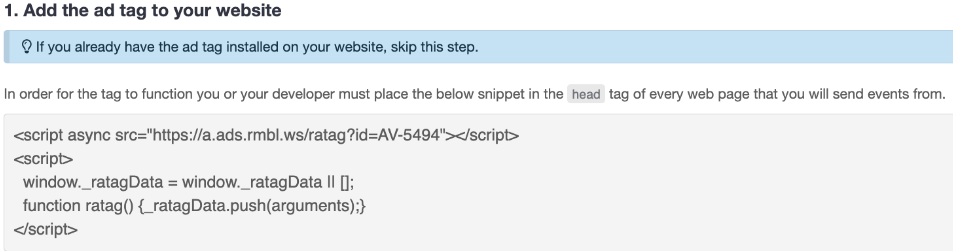
- In the HTML field, copy the code snippet from Tag set up in RAC Conversion Set Up and paste it into the Custom HTML field.
// example code snippet
<script async src="https://a.ads.rmbl.ws/ratag?id=AV-XXXX"></script>
<script>
  window._ratagData = window._ratagData || [];
  function ratag() {_ratagData.push(arguments);}
</script>
- Under Triggering, select All Pages (this will ensure the tag fires on all pages of the website).
- Save the tag.
Step 4: Set up the Conversion Confirmation Tag
- Create another tag by clicking New and name it "RAC Conversion Confirmation".
- Under Tag Configuration, select "Custom HTML".
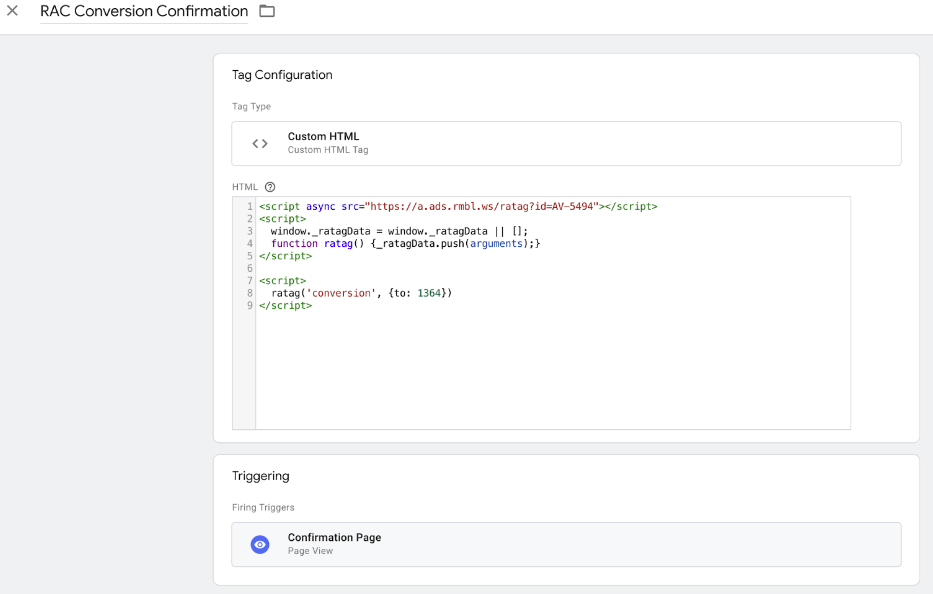
- In the HTML field, paste both scripts found in RAC Conversions setup:
- Under Triggering, click on the trigger icon and select Page View.
- In the Page View trigger configuration, set the trigger to fire on pages where the URL path contains "thank-you" or the confirmation page of your site.
- Save the tag.
Step 5: Preview and publish
- Once you've set up both tags, click on Preview in the top-right corner of the Google Tag Manager interface to test that the tags are firing correctly.
- After confirming that the tags work as expected, select Submit to publish your changes.
Summary of tags and triggers:
- RAC Global Tag: Fires on all pages of the website to capture user data.
- RAC Conversion Confirmation Tag: Fires on the "thank-you" or confirmation page to track conversions.
By following these steps, you should have successfully added the RAC tracking code to your site using Google Tag Manager.